
Bu yazıda, Remix JS kullanarak çok dilli bir blog oluşturmayı öğreneceğiz. Tüm süreç boyunca size adım adım rehberlik edeceğim. Remix'e başlayalım.
Önkoşullar
Gereksinimler oldukça basit:
Kurulum
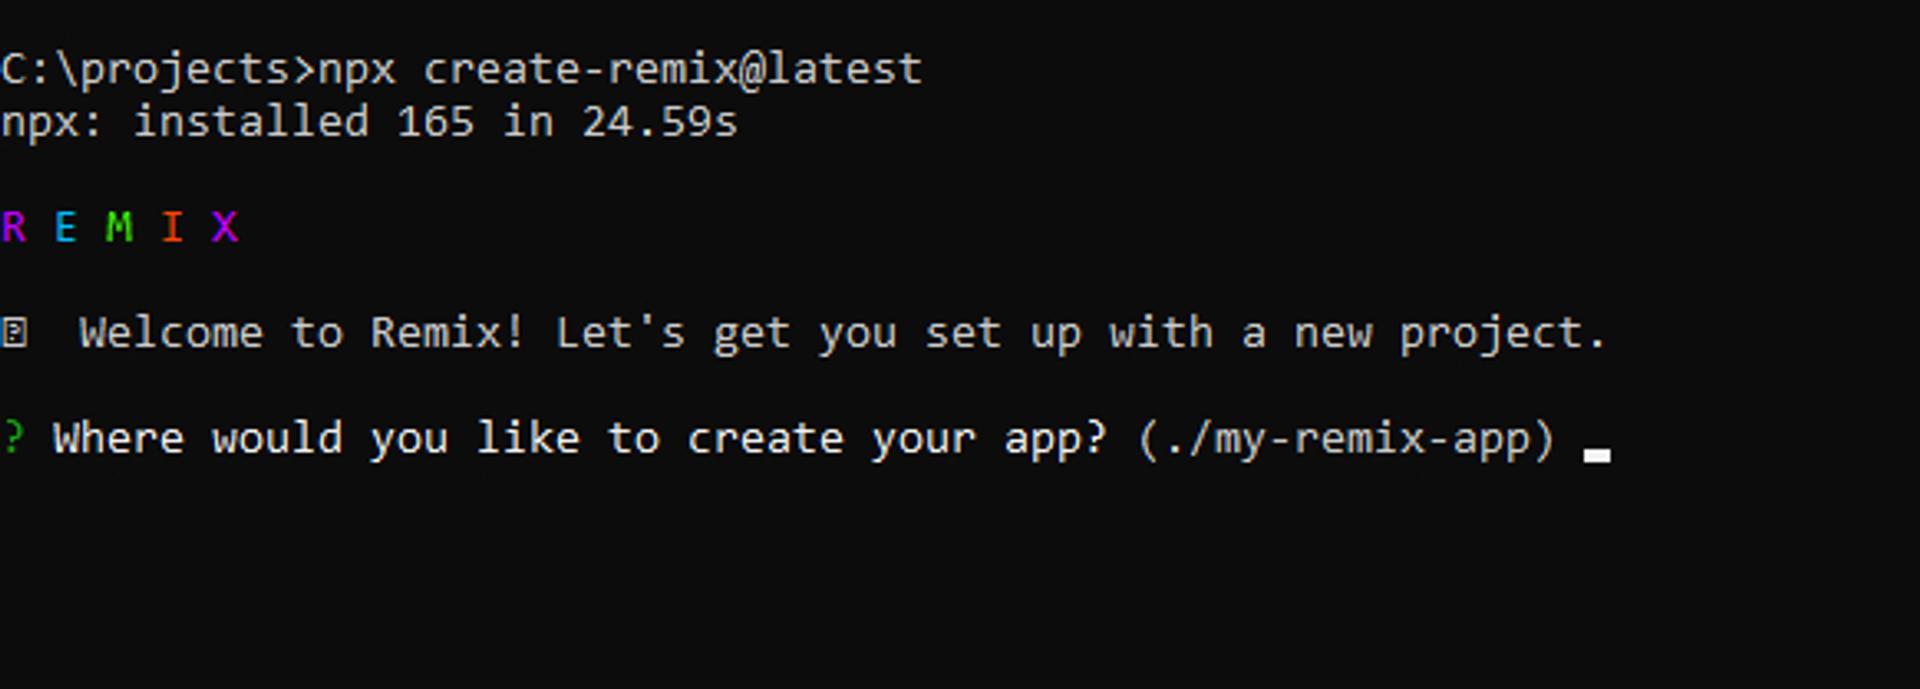
npx create-remix@latest
Yüklemek istediğiniz klasör adını seçin:
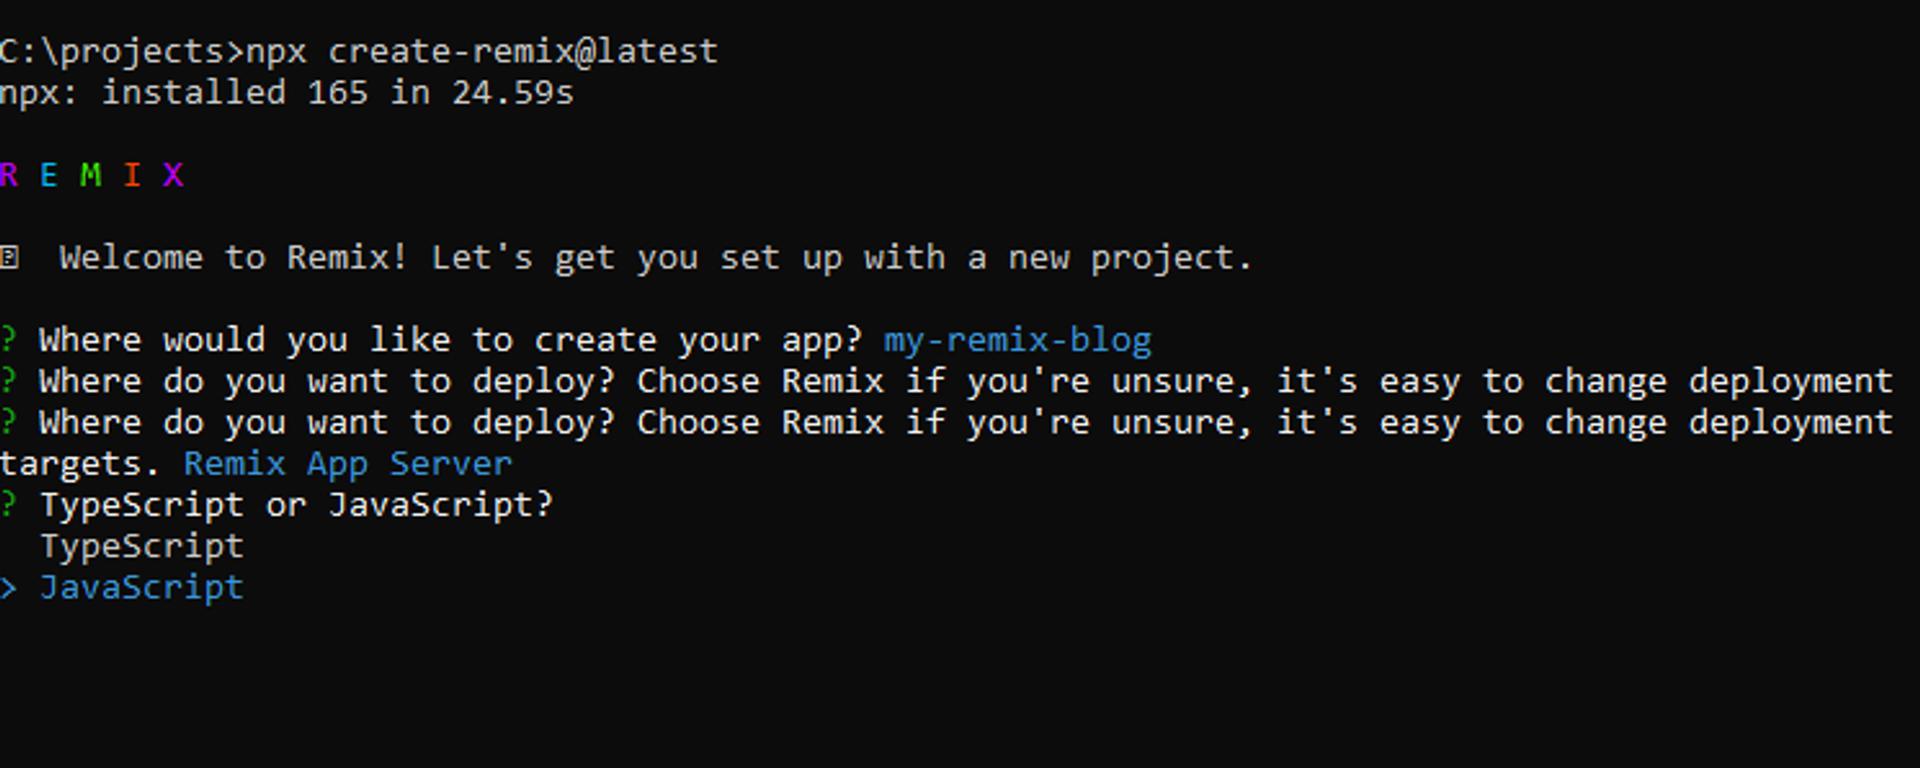
 Yerleşik sunucu olan Remix Uygulama Sunucusu seçeneğini seçin (bunu daha sonra değiştirebilirsiniz):
 Bu eğitimdeki kodu basitçe kopyalayıp yapıştırmak için Javascript'i seçin.
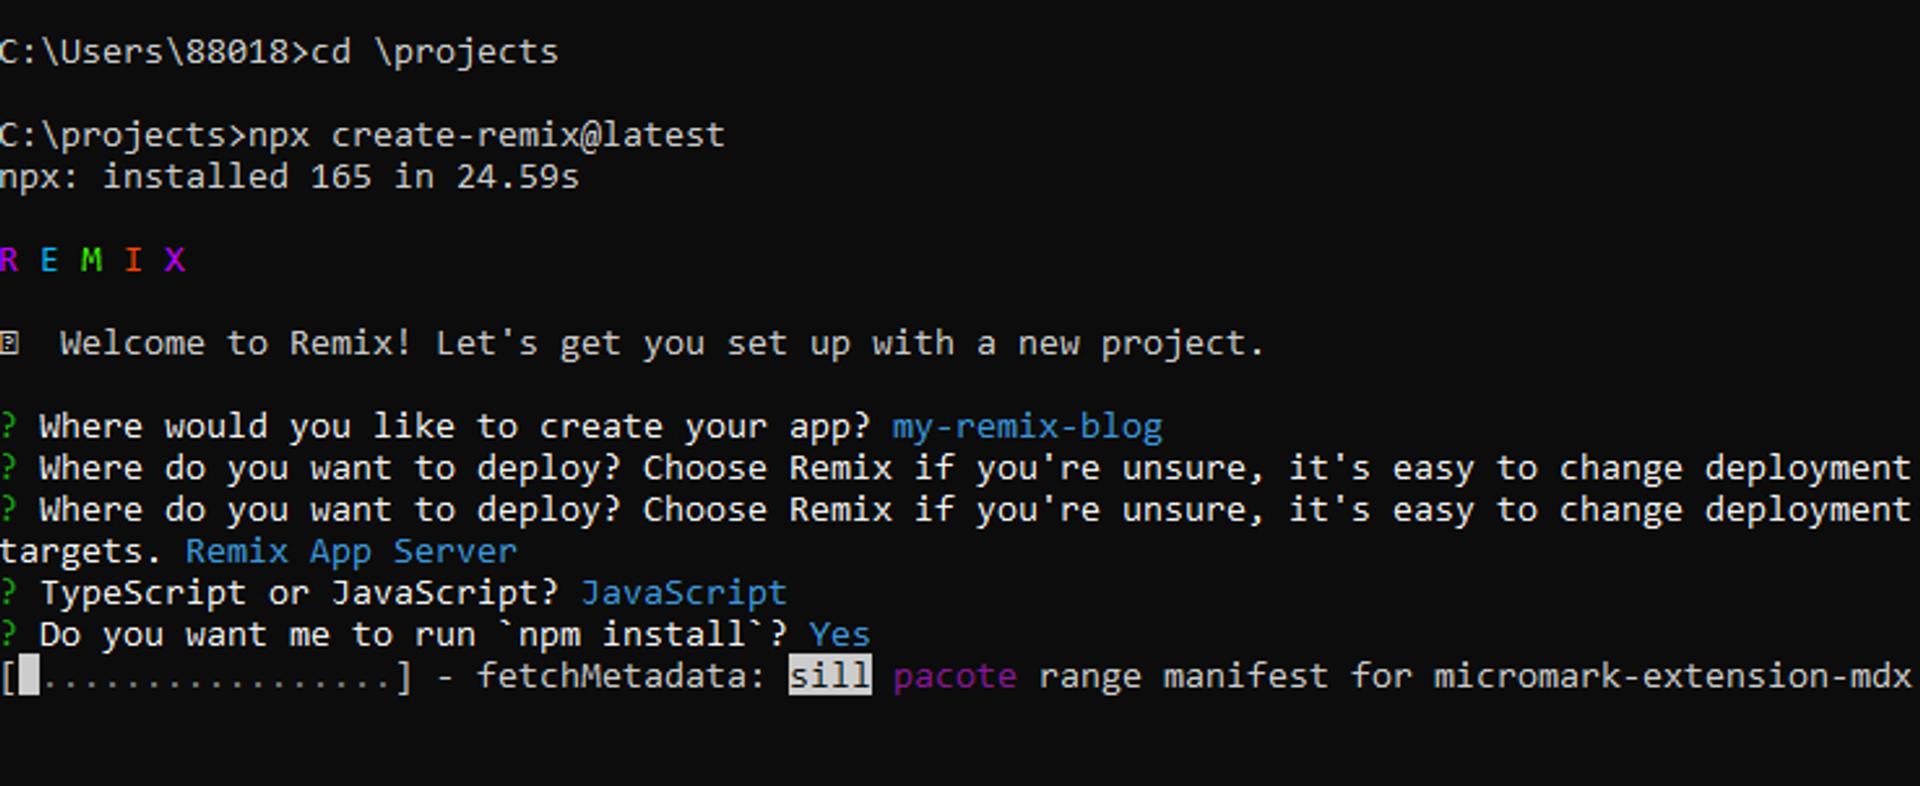
 Yükleyiciye çalışmasını söylediğinizden emin olun
npm install
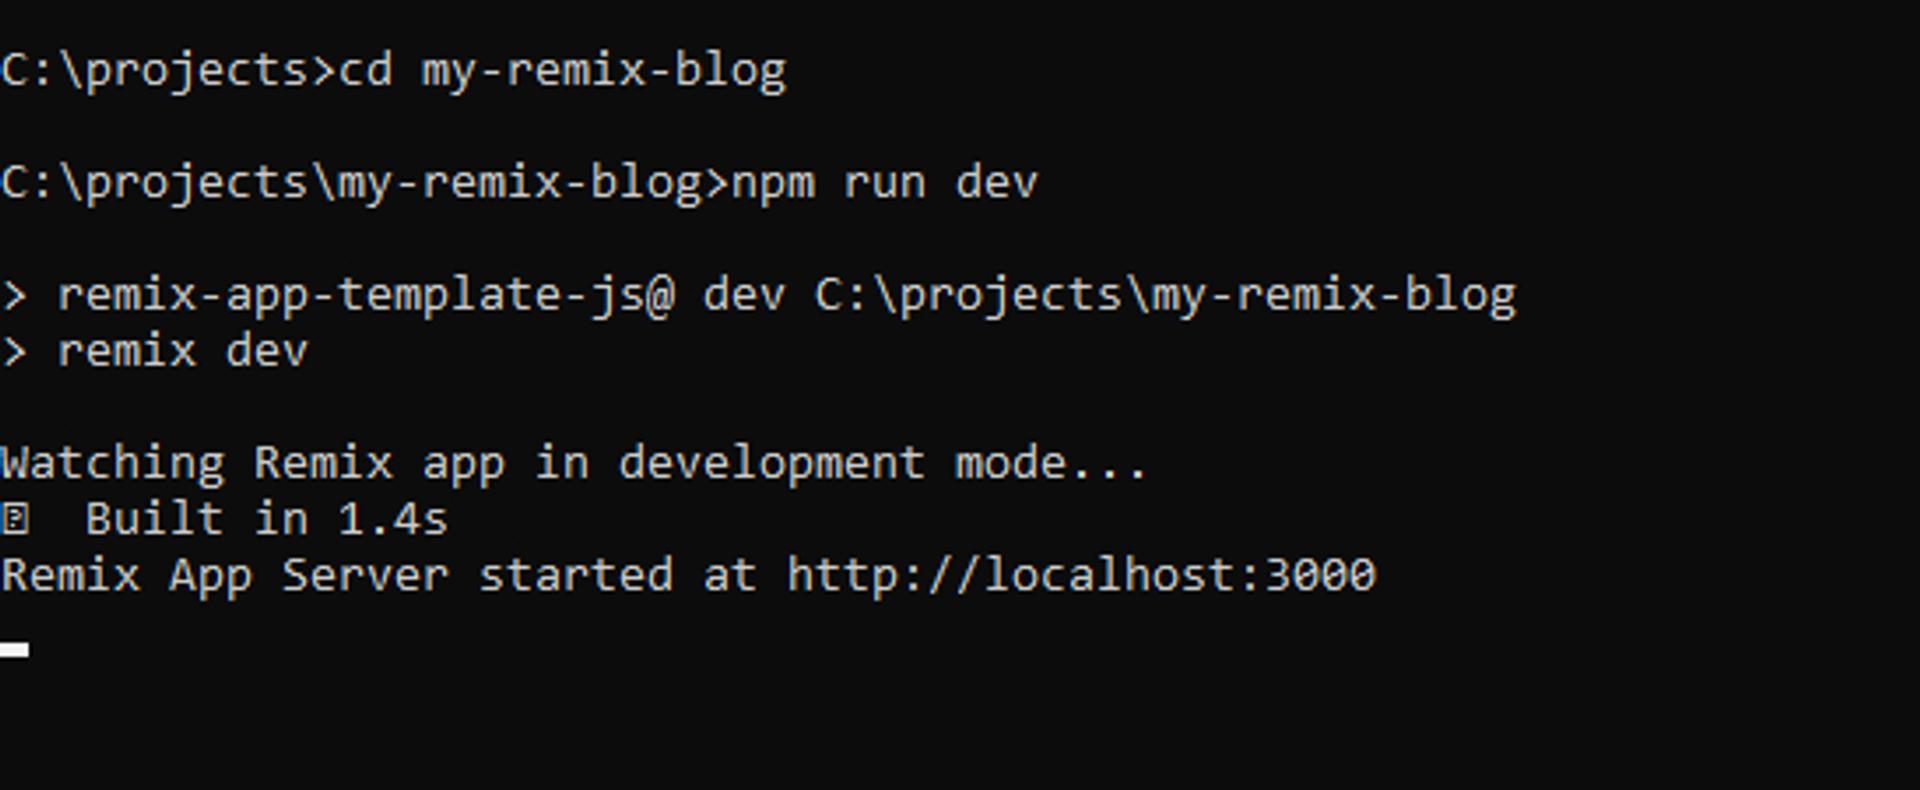
 Sonra cd klasör adı
Remix'i çalıştır npm run dev
Sonra cd klasör adı
Remix'i çalıştır npm run dev
 Remix hakkında daha fazla bilgi için remix.run adresini ziyaret edin!
Bir Blog Sayfası Oluşturun:
Uygulama klasörü, ana uygulama mantığımızı içerir. Routes klasörü altındaki tüm klasörler ve dosyalar halka açıktır ve bir URL ile erişilebilir. root.jsx — Uygulamamızın ana bileşenidir. Genel sayfa düzenimizi ve Bootstrap CDN'mizi içerir.
import { Outlet, LiveReload, Link, Links, Meta } from '@remix-run/react';

 export const links = () => [
  // Bootstrap CSS CDN
  {
    rel: 'stylesheet',
    href: 'https://cdn.jsdelivr.net/npm/bootstrap@5.0.2/dist/css/bootstrap.min.css',
  },
 ];

 export const meta = () => {
  return {
    description: 'A multi-language blog built with Remix',
  };
 };

 export default function App() {
  return (
    <Document>
      <Layout>
        <Outlet />
      </Layout>
    </Document>
  );
 }

 function Document({ children, title }) {
  return (
    <html>
      <head>
        <Meta />
        <Links />
        <title>Blog</title>
      </head>
      <body>
        {children}
        {process.env.NODE_ENV === 'development' ? <LiveReload /> : null}

        {/* Bootstrap JS CDN */}
        <script
          src="https://cdn.jsdelivr.net/npm/bootstrap@5.0.2/dist/js/bootstrap.bundle.min.js"
          integrity="sha384-MrcW6ZMFYlzcLA8Nl+NtUVF0sA7MsXsP1UyJoMp4YLEuNSfAP+JcXn/tWtIaxVXM"
          crossOrigin="anonymous"
        ></script>
      </body>
    </html>
  );
 }

 function Layout({ children }) {
  return (
    <>
      {/* Navbar */}
      <nav className="navbar navbar-expand-lg navbar-light bg-info">
        <div className="container">
          <Link
            className="navbar-brand text-color fw-bold"
            to="/"
            style={{ color: 'RGBA(0,0,0,.55)' }}
          >
            Blog
          </Link>
          <button
            className="navbar-toggler"
            type="button"
            data-bs-toggle="collapse"
            data-bs-target="#navbarTogglerDemo02"
            aria-controls="navbarTogglerDemo02"
            aria-expanded="false"
            aria-label="Toggle navigation"
          >
            <span className="navbar-toggler-icon"></span>
          </button>
          <div className="collapse navbar-collapse" id="navbarTogglerDemo02">
            <ul className="navbar-nav ms-auto mb-2 mb-lg-0 fw-bold">
              <li class="nav-item">
                <Link to="/en" class="nav-link">
                  English
                </Link>

              <li class="nav-item">
                <Link to="/es" class="nav-link">
                  Español
                </Link>


          </div>
        </div>
      </nav>

      <div className="container p-4">{children}</div>
    </>
  );
 }

 export function ErrorBoundary({ error }) {
  console.log(error);
  return (
    <Document>
      <Layout>
        <h1 className="text-center">Error
        <p className="text-center">{error.message}
      </Layout>
    </Document>
  );
 }
Ana Sayfa : Burada yeni bir dosya oluşturun, app/routes/index.jsx. Blog sitemizin ana sayfasıdır.
import { redirect } from '@remix-run/server-runtime';

 export function loader({ request }) {
  let languageHeader = request.headers.get('accept-language');
  let locale = languageHeader?.split(',')[0] || 'en';
  let language = locale.split('-')[0];

  if (!['en', 'es'].includes(language)) {
    language = 'en';
  }

  return redirect(`/${language}`);
 }
Makaleler Bileşeni — Polyblog API'sini kurun:
npm install @polyblog/polyblog-js-client
Polyblog API'den çektiğimiz tüm blogları gösterecek şekilde kodumuzu yazacağız ve görüntüleyeceğiz. Makaleleri bulmak için localhost:3000/en ingilizce makaleleri bulun, localhost:3000/es ispanyolca makaleleri bulun.
Bir klasör app/routes/$locale oluşturun
Bir dosya oluşturun app/routes/$locale/index.jsx
import { getArticles } from '@polyblog/polyblog-js-client';
 import { useLoaderData, Link } from '@remix-run/react';

 export const loader = async ({ params }) => {
  const locale = params.locale;
  let articles = await getArticles({
    // signup at https://www.polyblog.io/signup to get your blogId
    blogId: '4217f90b8eaa86551e7f7d55',
    published: true,
    locale,
  });

  return articles;
 };

 export default function BlogPage() {
  const article = useLoaderData();
  return (
    <>
      <div className="row row-cols-1 row-cols-md-2 g-4">
        {article.map(
          ({
            _id,
            locale,
            slug,
            coverUrl,
            title,
            author,
            creationTime,
            description,
          }) => (
            <div key={_id} className="col-md-6 col-lg-4 col-12">
              <Link
                key={_id}
                to={`/${locale}/${slug}`}
                className="text-decoration-none"
              >
                <div className="card h-100 shadow">
                  <img src={coverUrl} className="card-img-top" alt={title} />
                  <div className="card-body">
                    <h3 className="card-title my-3 text-dark">{title}
                    <h5 className="my-3 text-dark">{description}</h5>
                    <p className="text-dark">
                      Posted by {author} on{' '}
                      {new Date(creationTime).toLocaleString(locale, {
                        dateStyle: 'long',
                      })}

                  </div>
                </div>
              </Link>
            </div>
          ),
        )}
      </div>
    </>
  );
 }
Ayrıntılı bir makale gösteriliyor: Bir dosya oluşturun app/routes/$locale/$slug.jsx Tek bir makaleyi alıp ayrı bir sayfada görüntüleyen bileşendir. Ayrıntılı bir blog bulmak için localhost:3000/en/:slug adresine gidin.
import { getArticles } from '@polyblog/polyblog-js-client';
 import { useLoaderData } from '@remix-run/react';

 export const loader = async ({ params }) => {
  const { locale, slug } = params;

  const articles = await getArticles({
    // signup at https://www.polyblog.io/signup to get your blogId
    blogId: '4217f90b8eaa86551e7f7d55',
    locale,
    slug,
  });

  const article = articles?.[0];
  return article;
 };

 export default function ArticlePage() {
  const article = useLoaderData();
  return (
    <div>
      {article && (
        <>
          <div
            style={{
              width: '100%',
              height: '400px',
              backgroundImage: `url(${article?.coverUrl})`,
              backgroundSize: 'cover',
            }}
            className="mb-5"
          >
            <h2 className="text-center pt-5">{article?.title}
            <h4 className="text-center pt-3">{article?.description}</h4>
            <p className="text-center">
              <i>
                Posted by <span>{article?.author}</span> on{' '}
                <span>
                  {new Date(article?.creationTime).toLocaleDateString()}
                </span>
              </i>

          </div>

          <style>
            {`article img {
                max-width: 512px;
                display: block;
                margin-left: auto;
                margin-right: auto;
              }`}
          </style>

          <article dangerouslySetInnerHTML={{ __html: article?.content }} />
        </>
      )}
    </div>
  );
 }
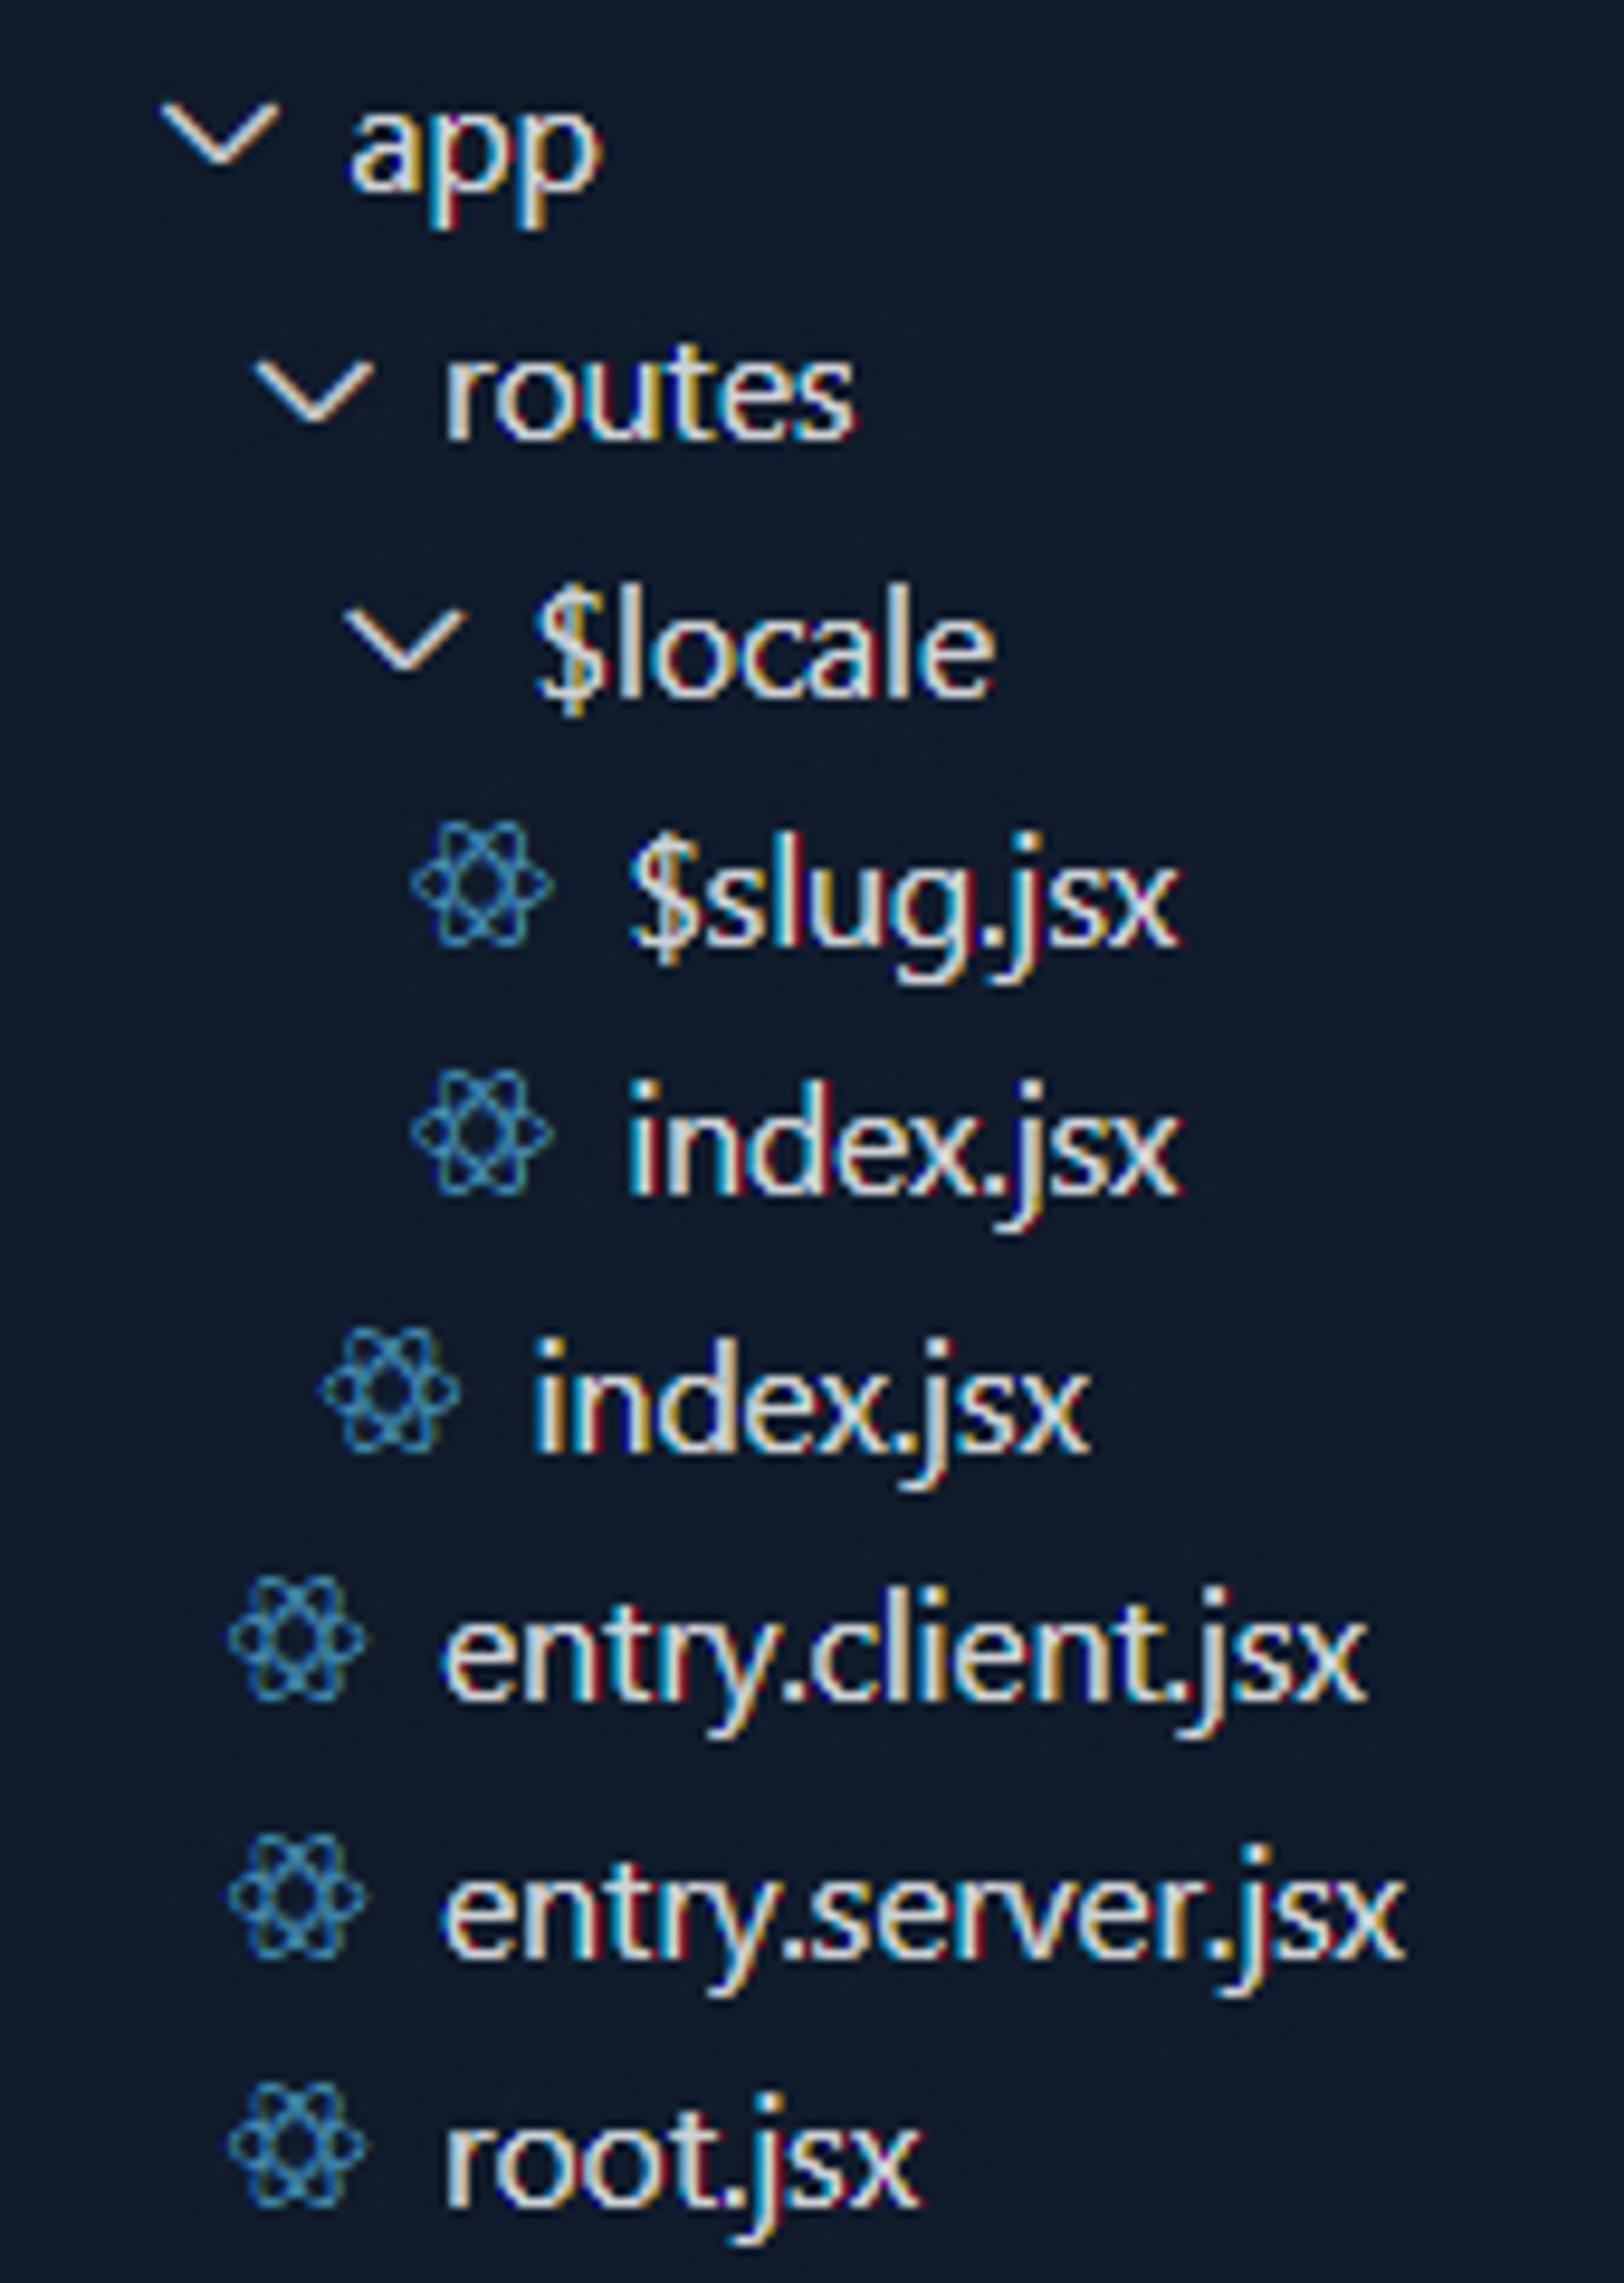
Blog kimliğinizin yukarıdaki kodu girmesi için https://app.polyblog.io/signup adresinden kaydolun. Kaydolduktan sonra, blogunuzun kimliğini bulmak için Ayarlar sayfasını ziyaret edin (ör. 1234567890abcdef12345678) Klasör yapımız şuna benziyor
app
 routes
 $locale
 $slug.jsx
 index.jsx
 index.jsx
 entry.client.jsx
 entry.server.jsx
 root.jsx
 \
\
Çözüm
İşte bu yazıda, Polyblog tarafından sağlanan API'yi kullanarak herhangi bir Remix web sitesine nasıl makale ekleyebileceğinizi anlattım. Çok dilli blogumuzu Polyblog API ile başarıyla oluşturduk ve bu bizim için kolaylaştırdı. Polyblog API Referansında desteklenen API parametreleri hakkında daha fazla bilgi bulabilirsiniz. Bu eğitimden geçtiğiniz için teşekkür ederiz! Herhangi bir adımda takılırsanız, bu github deposuna bakın ve sorununuzu bulun. Mutlu Kodlama!!!
